
My process of mounting art
This painting is now in its new home, but I thought I’d show you the basic steps I take when I mount art.
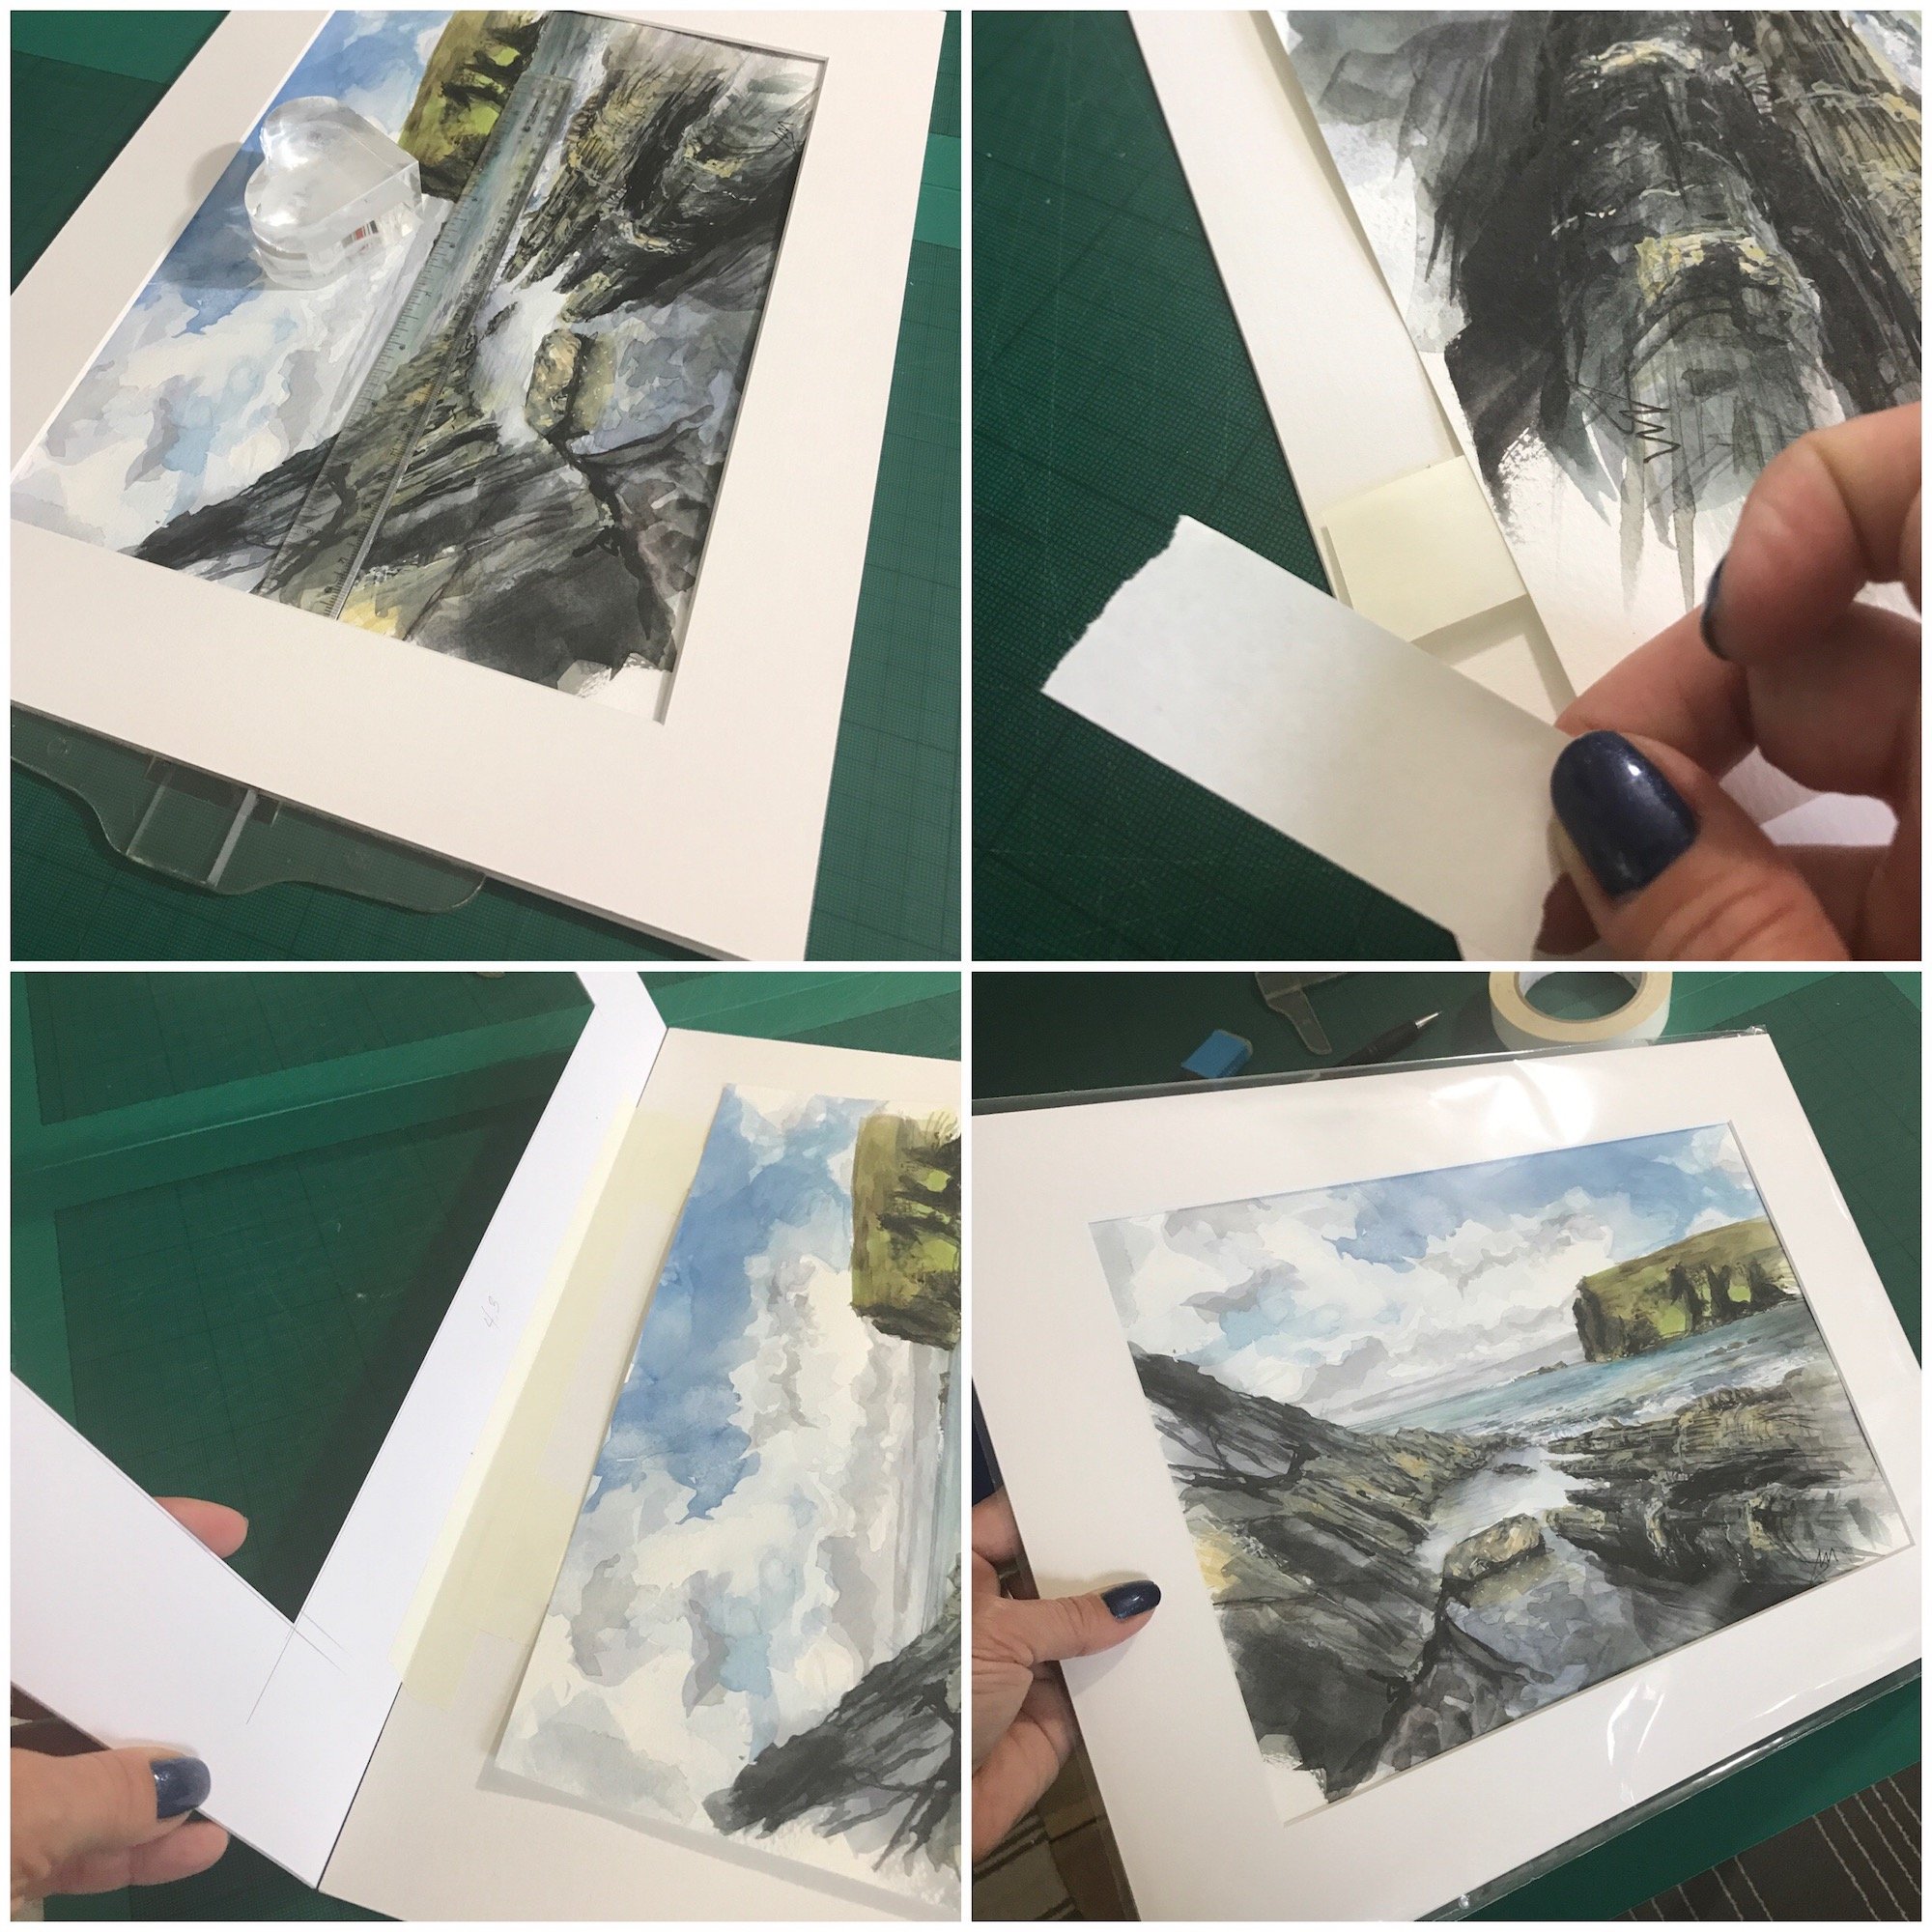
Cut down a large mount board to 300 x 400 mm pieces
Figure out what dimensions I want visible, then the border math is:
mount mm number minus visible mm number divided by 2 = border mm (do for h & w)
Cut on my Logan Artist Elite 450-1 (The BEST secondhand purchase I’ve ever made)
Add piece info and care instructions sticker to the back of the back board
Position using t-square (because there is a landscape horizon) and glass paperweight
Tape down with specialist tape. (Tape tabs affixed to the back of this piece.)
Hinge the aperture mount board to the backing board
Cello sleeve the whole thing with my business card inside the back

First steps in mount cutting
Mounting a watercolour painting
Mounting a watercolour painting
I buy mount board in bulk from Jackson’s Art in the UK, and the colour is a slightly off-white called Porcelain. I’ve been using it for years. I occasionally buy another colour if needed, like a pale grey or black, but typically stick with Porcelain. Black mounts are also a huge pain in the ass since black gets dirty easily and also shows dust like crazy.
My methods can change depending on what kind of art I am mounting, but this post should give you a basic overview. There are so many tricks I’ve learned over the years of cutting hundreds of my own mounts. I’ve even tackled multiple aperture mounts (with different sized holes), floating mounts and more. I learned all this by doing, and a few books and websites along the way.
If you want to cut your own mounts (also called “mats”), I highly recommend buying a Logan or similar - they stay put (stable) and they pay for themselves. I used to waste a lot of board when I had a more simplistic system of only a ruler and cutter. I have no doubt that being able to provide my work in custom mounts (often cut to fit standard frames, or IKEA frames) has led me to selling more work. Mounts are also great for protecting art when stored or in print racks.
Hope this helps and maybe encourages you to give it a go. There’s lots of detailed info out there, and I promise it’s not that difficult once you get up and going.